Support the Work

If you have found the information on this blog useful, enjoyable, candid, or inspirational ... help keep it reader supported, journalistically driven, available to all, and advertiser-free. If you are able and inspired to do so, please consider a subscription to this blog. You can drop a dime or two every month, every year, or whenever you feel moved.

It will keep me writing, gathering facts, and interviewing the experts.

Love,

Elisabeth

CLICK HERE TO SUPPORT THE WORK

Parent / Sponsor


NEED TO FIND SOMETHING?
Join The Email List

Get Tastiness to Your Inbox

* indicates required

A blog about all things allergen-free and delicious

Entries in Food History (3)

Thursday
Jun272013

Ice. The Diamonds of Cuisine: Interview with Randy Finch, Ice Guru

Randy Finch in a photograph by Steph Harding from 2012

PHOTOGRAPHS BY STEPH HARDING

Interview by Elisabeth Veltman


Chef, artist, TV personality, and chainsaw genius, Randy Finch, along with his partner Derek Maxfield, have come to embody the words, “ice” and “art.” Their team has been featured on the Discovery Channel; are in “Ripley’s Believe it Or Not”, and were featured in a show called “Ice Brigade” on The Food Network. I had the privilege to catch Randy for a chat, and visit his very “cool” studio with Steph Harding, photographer, for a fun departure from our regularly scheduled subject matter (food allergies).  

TENDERFOODIE:  Ice sculpture has rather utilitarian roots didn’t it?  But, within a century it became quite an elaborate art form.  When did the art of ice sculpture really begin?

RANDY:  The beginning is debatable. The first documented ice sculpture, was the famous ice palace of 1740, commissioned As seen in Women's Lifestyle Magazine, June 2013by Empress Anna Ivanovna of Russia. She had commissioned this palace and staged a mock wedding there.

TENDERFOODIE:  I read about that! She forced some guy she was angry with to marry one of her servants, spend the entire night in the palace, and expected them to sleep on a bed made of pure ice.

RANDY: Yes! I actually have an original article about this from 1741. It was published in a gentleman’s magazine at the time. The palace was quite elaborate, with trees, birds, and an elephant all made of ice.  

TENDERFOODIE:  Wow.  Tell us more about how ice sculpture has evolved since then.

RANDY:  Mostly, ice was used to keep food cool on the table, and it evolved into art. This was a technique used in the creation of Peach Melba. In fact, they originally used ice swans to display that dessert.

TENDERFOODIE:  Oh, Peach Melba! Created for the legendary opera singer, Nelly Melba, correct?


RANDY:  That is correct.  In the early 1900’s, ice chandeliers, fountains and elaborate sculptures became more common. The quality sagged off in the U.S. for a while, and now it is coming full circle, and more elaborate sculptures are once again becoming common.

TENDERFOODIE:  Why the resurgence?  

RANDY:  People are looking for unique and different things today. Until recent years, it wasn’t just elaborate sculptures that took time; simple products did as well. For instance we used to hand produce little sorbet dishes made of ice, and each would cost at least $35. New technology allows us to make them more quickly and at much less cost. We were the first to use computerized equipment in the U.S. We started using it in Grand Rapids, MI, three months ahead of Las Vegas!

TENDERFOODIE:  Seriously?  How did this happen?

RANDY:  We’ve been in the business for a long time and have many personal relationships in the ice business. We knew the guy who was making the equipment in Canada, and had first dibs.


TENDERFOODIE:  What other products come from this equipment?

RANDY: We can make large bins of ice that hold ice cream for parties, dishes, drink dispensers, and parts for drink luges where the party guest can interact with the sculpture. That is our niche: Interactive ice sculpture that is both functional and beautiful.

TENDERFOODIE:  I saw a video of the ice desk that you did, and oh that grand piano that actually plays, and the pool table! What other interactive sculptures do you do?

RANDY:  The desk was for a Food Network executive. That was really fun. One of the most outrageous projects was a 30-foot long mousetrap game that included a double, fully functional Ferris wheel, and a cannon that lights up and fires. It is based upon the concept of Rube Goldberg, an artist that did drawings of very elaborate ways of doing the simplest things. We did the Mousetrap game for a show called “Recreation Nation” on the Discovery Channel.

TENDERFOODIE: I saw your mousetrap sculpture on YouTube. Truly amazing. Is this your favorite project?


RANDY:  The double Ferris wheel is nearest and dearest to my heart. It actually made it into Ripley’s Believe It Or Not.  But other than that, the next project is always my favorite, whatever the next project might be. We recently did a 32-foot ice dessert bar and a live performance. We created an ice motorcycle with live pyrotechnics coming from the tail pipe right on stage. We are doing a lot more live performance shows as well. We love doing them.

TENDERFOODIE:  You are a chef, and artist, and you must be an engineer of sorts to do what you do. How did you go from chef to an ice sculptor wielding a chain saw?

RANDY: Well, I also studied architecture, and we are known for our power tools. In fact we often choose the chainsaw or drill, even if a chisel is easier! But I did start out as a chef. I went to culinary school and worked as a private chef for Jay Van Andel for quite some time. I was the chef at Cygnus and for Peter Island Resort. My culinary training helps make for great relationships with chefs. I know how to design for any food without being taught. If the chef wants a caviar station, then I know we also need to accommodate blini, and how to design any sculpture so that it works for whatever food creation the chef can dream up.

TENDERFOODIE: What does an ice sculptor do in the summer?

RANDY: One of the biggest things we do in summer is sell our scrap ice, because it melts so much more slowly than regular cubed ice. Fishermen and tailgaters drop off their coolers on Monday, and pick them up on Friday for the weekend.  As we do weddings and graduation sculptures, we throw the extra into their coolers. We are also doing sculpture for Kid Rock backstage.

TENDERFOODIE:  Tell me, ice & cold are rather counter-intuitive symbols of romance. Why do you think it has come to be so closely connected with celebrations and love?

RANDY:  There is a simple elegance to ice. It is artistic. Art and romance have always gone together.  Ice sculpture is created for one, single event. It’s just for you. Ice swans, for instance, are typical sculptures for weddings because they mate for life.  Ice is sensuous. It has clarity and a slickness. Like a diamond, the light gives the sculpture a life of its own.  Like life itself, the ice sculpture transforms the entire time it exists. That’s why people love it and that’s why I love working with it.

 See more about Randy and his team...


About Elisabeth

Owner of Blue Pearl Strategies, Elisabeth is also The Tender Foodie. She started this blog and The Tender Palate, to help those food allergies and sensitivities.

Thursday
Mar212013

Turn Me On, Muffin!

PHOTOGRAPH BY JEFF HAGE, GREEN FROG PHOTO

Once a most fashionable, on the go treat, the muffin has become the ugly stepsister to the flashier, sweeter, more complex cupcake. At one time, however, muffins were so sexy that they sold them without the bottoms. A “stud muffin” was popular slang for a hot guy, and more recently (and more intimately), a “muffin” was a cutesy way to talk dirty about our lady parts.

Now, the top of this cup-sized bread has become the rather undesirable bulge that hangs over our jeans. What has happened to the muffin?


A WEE CAKEY HISTORY


The muffin has been around for centuries with only a few key pivots in its culinary transformation, despite its colorful cultural As seen in Women's Lifestyle Magazine's March 2013 editionreferences. The English muffin dates back to the 10th century in Wales, and is a small, flat, yeast-raised bread that is cooked on a hot griddle. It began as a servants’ food of leftover bread, biscuit dough and mashed potatoes.  When the aristocracy tasted the English muffin, it became a popular teatime bite. In the 18th century, street vendors called “muffin men” put tins on their heads, or wooden trays around their necks, rang bells, and sold these nooks and crannies on the streets.

The American muffin appears closer to the 18th century, and is more of a quick bread made from a batter, rather than dough like the English version. American muffins were also a way to turn leftover bread, fruits, even meats into a tasty treat.

So, what is the difference between a muffin and a cupcake? Gluten-free Pastry Chef Kyra Bussanich says that cupcakes get their flash from the higher ratio of sugar to flour, and because of the creaming method of whipping the butter (or fat) until its light, and then adding in the sugar, and then the eggs, and then finally adding the flour. This method creates a tender cake crumb after baking.

On the other hand, muffin batter usually starts with the dry ingredients mixed in one bowl, and then the wet ingredients mixed together in a separate bowl before combining with the hands or spoon. This method creates a bread-like texture.


PALEO:  HEAR MUFFIN ROAR


Modern food allergies present new culinary challenges for the muffin, but I predict a muffin comeback. With over 20 million people developing gluten sensitivity and cross-reacting to different grains, people aren’t just going gluten-free, they are going GRAIN-free! This throwback to hunter-gatherer style eating is forcing yet another chapter in muffin history. The Paleo muffin. Now what could be sexier than a muffin in a loincloth?

One of the most popular flours to use in this Paleo diet is coconut flour. Here are a few tips on using coconut flour, and try this recipe for some yummy, grain-free muffins.


COCONUT CREAM MUFFINS

PREPARE

Preheat oven to 350 degrees F.
Line a muffin tin with 12 muffin cups or heavily grease with coconut oil

Yield:  12 muffins
Gluten-free, Dairy-free, Soy-Free
 

INGREDIENTS

1 c. coconut flour (do not pack)

3/4 c. unsweetened coconut flakes

1/2 tsp. sea salt
1/2 c. coconut oil (melted, but not hot)

6 eggs (whisked)

15 oz. can of Thai East Organic Coconut Milk (with the coconut fat in the can mixed in to make the cream)

1/2 c. honey

1 tsp. gluten-free vanilla

1 c. chocolate chunks from Enjoy Life Foods (or chips, or mini-chips, or whole, raw cranberries)


COMBINE

In a large bowl, whisk together the coconut flour, salt, and coconut flakes, getting out any lumps that might remain. It is a good practice to sift the flour before you measure it, so no lumps or packed flour can throw off the recipe. In another med/large bowl whisk the eggs, then add in the coconut oil, honey, coconut cream, and vanilla.  Slowly add in the coconut flour mixture to the egg mixture until well-combined.  It will be a thick batter.  Add in 1 cup of chocolate chunks or whole, raw cranberries.


BAKE

Place muffin cups into a muffin tin, or grease the tin well with coconut oil. This is a sticky, absorbent flour, so regular oil will get sucked into the batter and away from the tin. Spoon the batter into the prepared muffin tin so that each cup is evenly full.  Bake at 350 degrees F. for about 30 min., or until the tops of the muffins are slightly brown and just firm to the touch. Do not overbake.

Enjoy!


About Elisabeth


Owner of Blue Pearl Strategies, Elisabeth is also The Tender Foodie. She started this blog and The Tender Palate, to help those food allergies and sensitivities.


Monday
Feb112013

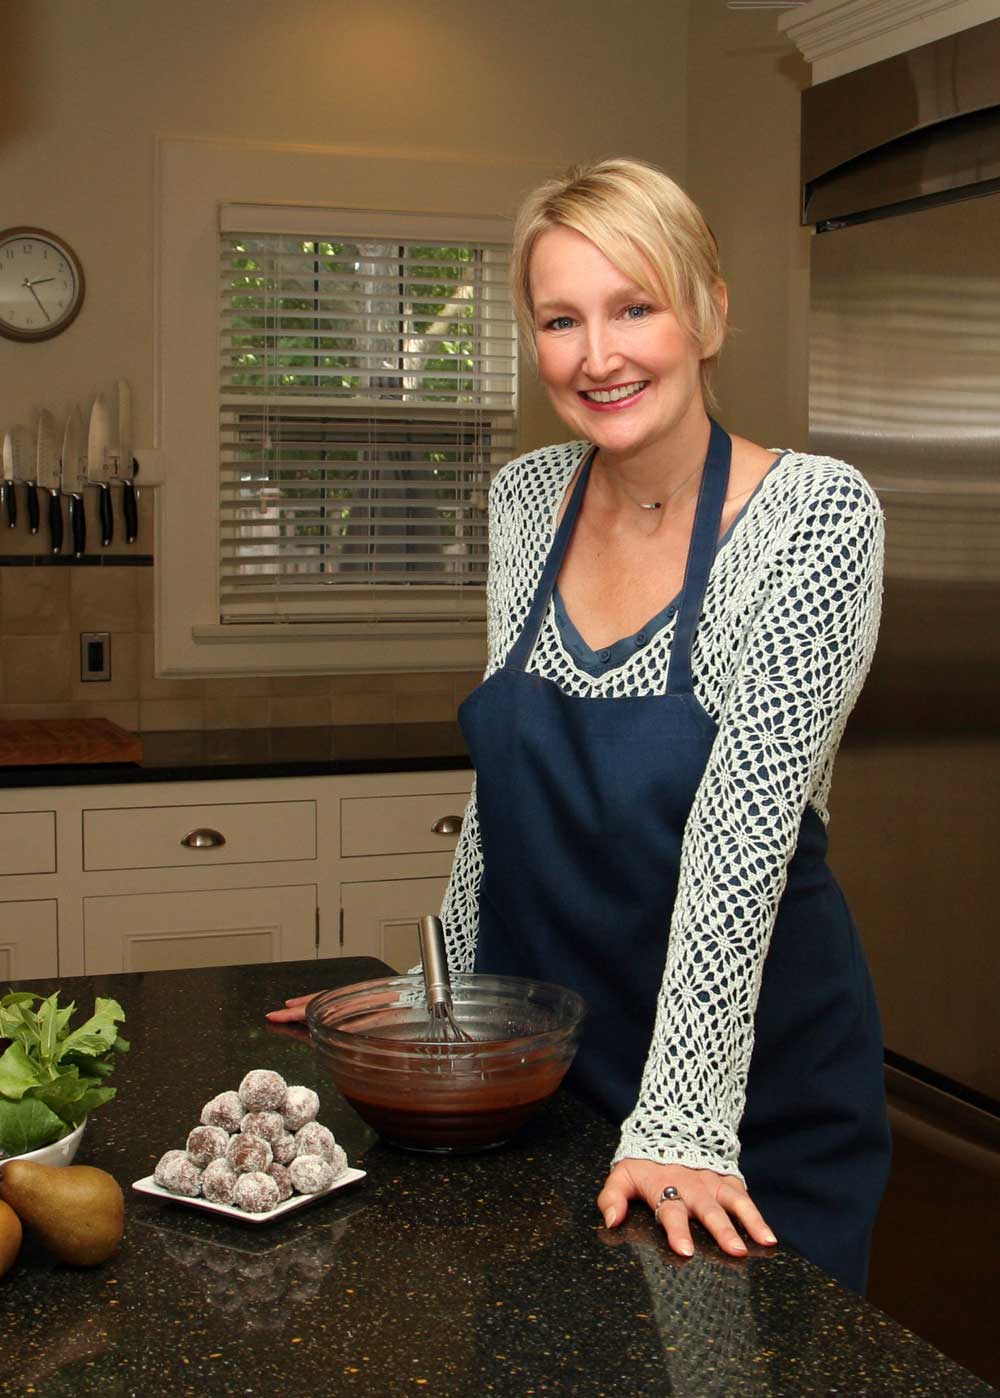
Recipe: Almond Cognac Truffles


 PHOTOGRAPH COURTESY OF JEFF HAGE, GREEN FROG PHOTO


BY ELISABETH VELTMAN, THE TENDER FOODIE

What would Valentine's Day be without chocolate?  It would be the day I made the front page of the New York Times ("Single Gal Sets Hallmark Store on Fire").  My love affair w/ this beautiful bean began many moons ago, and has evolved to accommodate the onset of dairy and now, tapioca allergies (tapioca is used in place of soy lecithin in soy-free chocolate). Thanks to a few forward thinking chocolatiers, there are truly dairy-free, even soy-free choices out there, the quality of which, make excellent truffles.

Truffles, in my opinion, are the quintessential gift, though I do confess that these don't always make it to the intended recipient.  This recipe is my favorite.  It combines a soft, sensuous center that leaves you a little buzzed, cupped by a hard chocolate shell waiting to be snapped.  Yeah, they taste as sexy as they sound. Go forth Lovers, make them, eat them, and be ... inspired.


RECIPE:  ALMOND COGNAC TRUFFLES

Dairy-free, Gluten-free, Soy-free, Egg-free
Copyright, Elisabeth Veltman, The Tender Palate

INGREDIENTS

10 oz. of dairy-free bittersweet chocolate – chopped in small chunks for the ganache
6 more oz. tempered for the ganache (see below)
8 more oz. tempered for the coating (see below)

Recommended brands:  Enjoy Life Bittersweet Chocolate Chunks (made w/o soy, but w/ tapioca)  or Callebaut Bittersweet Chocolate (made w/ soy lecithin)

½ cup of coconut cream (measured after the fat is stirred in)
    (Recommended Brand: Thai East Coconut Milk)

1 TBS of coconut oil (melted)

2 tsp. of almond extract (gluten-free)

4 TBS of cognac (pure distilled)

½ cup of granulated sugar (for sprinkling)


MAKE THE GANACHE

Place 10 oz. of chopped chocolate into a medium-sized bowl. In a small saucepan, bring the coconut cream just to a boil and immediately pour over the chocolate chunks.  Add the coconut oil.  Shake to evenly coat, and then cover the bowl with a plate to seal in the steam.  This will melt the chocolate.  Ignore for 10-15 minutes, and then whisk the mixture vigorously until there are no lumps and the chocolate has a lovely shine to it.  Whisk in the cognac and the almond extract.  

Temper 6 oz. of chocolate: As you wait for ganache to melt together (above), place 6 additional oz. (3/4 c.) of chocolate chunks into a Pyrex* measuring cup and place into the microwave for 20 seconds.  Stir, even if the chunks aren’t melted yet.  Place the chocolate back into the microwave for 20 more seconds, and then stir again.  Repeat this until the chocolate melts at 15-second intervals.  When all of the chocolate is melted and stirred, you have tempered chocolate.  This will add to the texture of the truffles.  Add this to the Ganache and whisk until the shiny again.

At this point, place your ganache, covered, in the refrigerator to firm up for an hour or over night.  

*Use the Pyrex brand of measuring cup, since it conducts heat evenly.  Some containers will burn the chocolate in the microwave.

ROLL & COAT

Temper another 8 oz. of chocolate chunks in the microwave, using the same method above, but set aside.  

Remove the ganache from the refrigerator.  If it is too hard, simply let it sit for 30 minutes.  With a small melon baller, tiny ice cream scoop, or a spoon, scoop out the ganache and roll in your hands to make a small, round ball.  Continue until the ganache is all balled up.  Place each ball on a plate with an inch of space around each one.  The carefully spoon the last batch of tempered chocolate over the top of each ball so that it seeps over the top and down the side and creates an upside down cup.  Place the plate(s) of truffles in the refrigerator to set for about 30 minutes.  When the chocolate is set (the outer coating will be hard, and the filling will be firm but soft) turn each truffle over and sprinkle the ganache filling with sugar.  

Serve cold or at room temperature.  Best to store covered in the refrigerator.


About the Author


Writer, owner of Blue Pearl Strategies, and lover of all culinary delights, Elisabeth is a Tender Foodie. She started The Tender Palate, a website for foodies with food allergies where she consults with experts from every area of the Tender Foodie life. She believes that everyone should live deliciously and have a healthy seat at the table. Find her at www.tenderpalate.com.